Surfacing Documents
Document List widget
The Hyland OnBase - Document List widget enables lists of Documents to be presented to the portal user, which can be configured to show according to who the user is, and can be made searchable.
The Documents can be made downloadable, and configured to provide the user with the ability to act on the document, for example updating it or making a payment via a Form submission.
The first step of configuring the widget is to create a Custom Query Configuration. You will then need to add a Document List widget to a Jadu Homepage and configure it.
Creating a Custom Query Configuration
To create a Custom Query Configuration:
-
Using the left-hand navigation bar, go to OnBase > Custom Query Configuration.
-
Click the Create Configuration button.
-
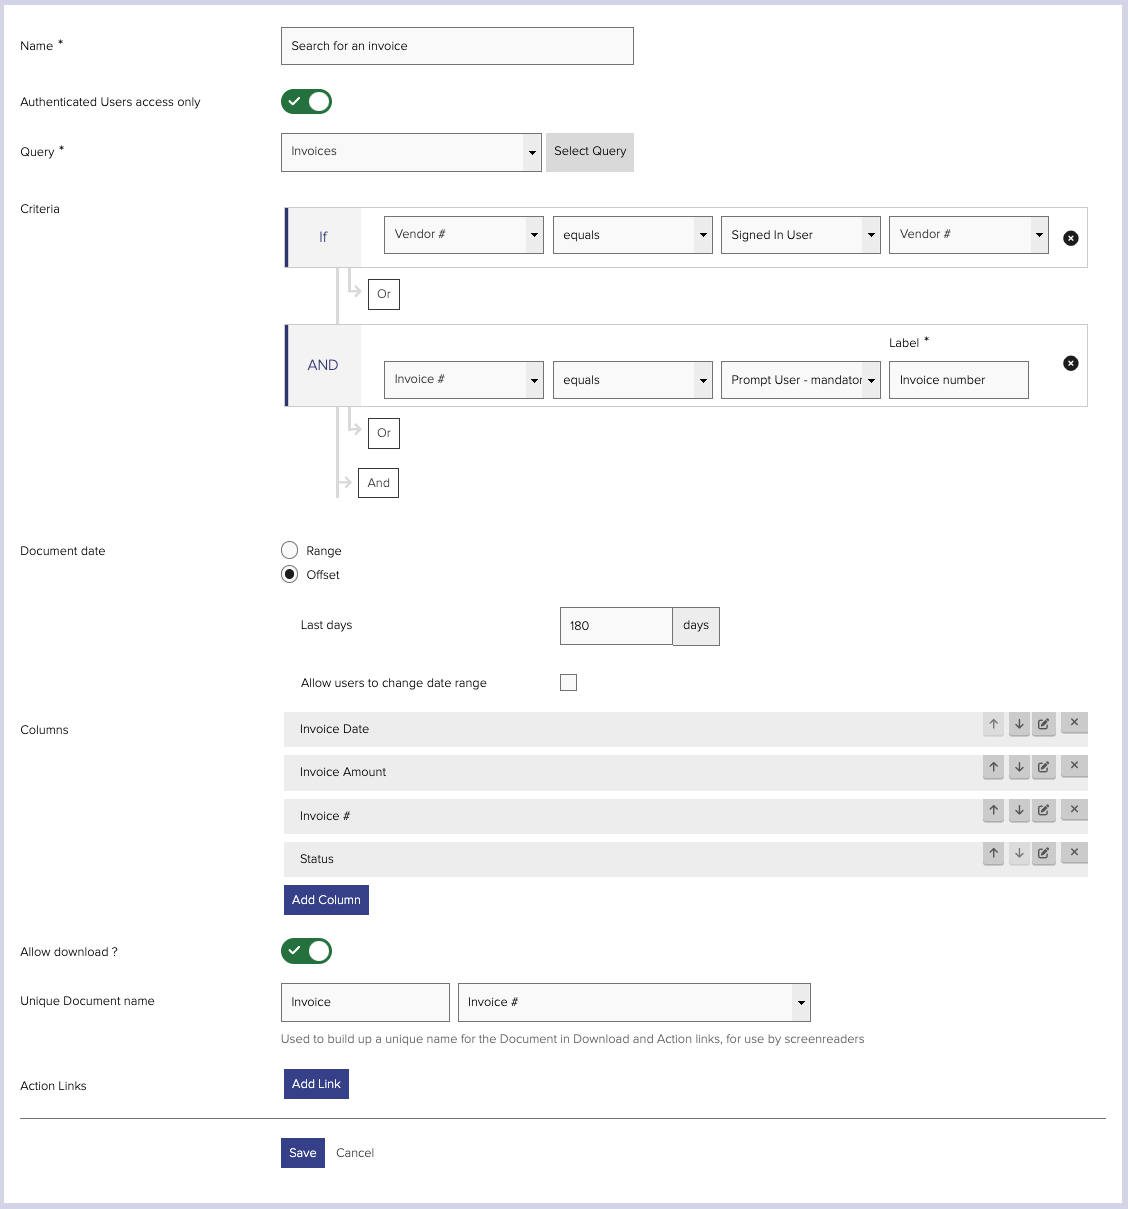
Give your configuration a name. The name is simply used for identifying the configuration within the system, it is not presented to the portal user.
-
Decide whether portal users must be signed in in order to view the list of Documents. If this is enabled and the user is not signed in to the portal, the Document List widget will be hidden.
-
Select an OnBase Custom Query to provide the list of Documents (only 'By Document Type' Custom Query Types are currently supported). Click Select Query.
-
If your Custom Query has one or more Retrieval Keywords configured, then you will see an Add Criteria button. When this is clicked, a rule-style interface will be available for building up criteria to determine which Documents should be listed.
Each row in the criteria consists of:
- the Keyword
- the comparator (equals, is exactly, contains, is not equal to, is less than, is more than, is less than or equal to, is more than or equal to)
- how the value should be determined:
- Static - allows a fixed value to be specified within the Criteria
- Prompt User - mandatory - will require the portal user to enter a value when viewing the Document List widget. If they do not enter a value, the query will not be run and the user will see an error message.
- Prompt User - optional - will give the portal user the option to enter a value when viewing the Document List widget. If the user does not enter a value, this row is removed from the criteria when running the query.
- Signed In User (only available if Authenticated Users access only is enabled) - will allow an attribute of the signed-in user to be included as part of the criteria. See also Retrieving Extended User Data.
- Related Object Attribute - allows for displaying results which have a keyword value in common with an attribute value of a WorkView object. See Related Documents and Objects.
- Related Document Keyword - allows for displaying results which have a keyword value in common with another Document. See Related Documents and Objects.
- depending on the selection in the previous field, the final field will be:
- an input field (text or date picker) to provide the value to use for the Keyword, where Static was chosen
- an input field to provide the label to use for the input field presented to the portal user, where Prompt user was chosen
- a dropdown list of user attributes to select from, where Signed In User was chosen
- dropdown lists to select a WorkView Application, Class, and Attribute, where Related Object Attribute was chosen
- a dropdown list to the select a Document Keyword, where Related Document Keyword was chosen
-
Optionally configure a date range to restrict documents to. This can either be entered as a fixed start and end date, or an offset (number of days) from the current date. You can also optionally allow portal users to alter the date range that you've specified when viewing the widget. If enabling this, you will be prompted to provide a label for the date range selection. Portal users will always see from and to date pickers regardless of whether Range or Offset has been selected in the Configuration.
-
Next, configure the columns to display within the widget. The default columns defined in the Custom Query will be pre-configured, however these can be renamed, re-ordered, or removed, and additional columns can be added.
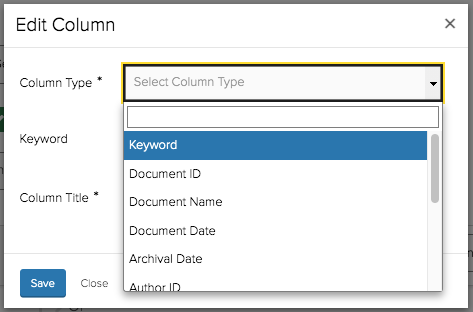
To add a new column click the Add Column button. A popover will be present prompting you to select a column type (this can be Keyword or one of the static metadata types such as Document ID, Document Name, Document Type, etc). If Keyword is selected, you then will be prompted to select a Keyword (from a list of all Keywords in OnBase that the Service User has access to). Finally you will need to give the column a title, this will be displayed in the widget to the portal user.
To edit a column, click the pencil icon alongside the column. You will be presented with the same popover as when adding a new column, allowing you to edit the setup.
To remove a column, click the X icon alongside the column.
To re-order columns, click the up and down arrows alongside the columns until they are listed in the desired order.
-
If you wish for documents to be downloadable, enable the Allow download? toggle. If this is enabled, for each document listed within the widget the user will be presented with a secure download link.
-
In order to display links in tabular format (i.e. in the Document List widget), to support portal users who use Screen Reader technology, it is necessary to provide the Screen Reader with a unique identifier for each Document so that the user can understand which Document the link is for when links are read out of the context of the table. The Unique Object Name can be made up of a prefix (optional) and a Keyword value, or the Document Name.
For example, if the Document returned by the Custom Query are Invoices and there was an Invoice number keyword for the Document Type, you may enter "Invoice" for the prefix and select the Invoice number Keyword. If there was an Action Link (see below) configured with link text of "Pay", for invoice number 123 this link would be read out as "Invoice 123: Pay".
If download links were enabled, the Download link would be read out as "Download Invoice 123".
-
Finally, Action Links can be configured to show within the widget. By configuring Action links, you can provide the portal user with the ability to act on a particular Document within the results. This could be used to allow them to provide an update or further information, or make a payment in relation to a Document.
Action links can be configured to display based on the Document Type and/or value of a Keyword, or to display for all documents in the list.
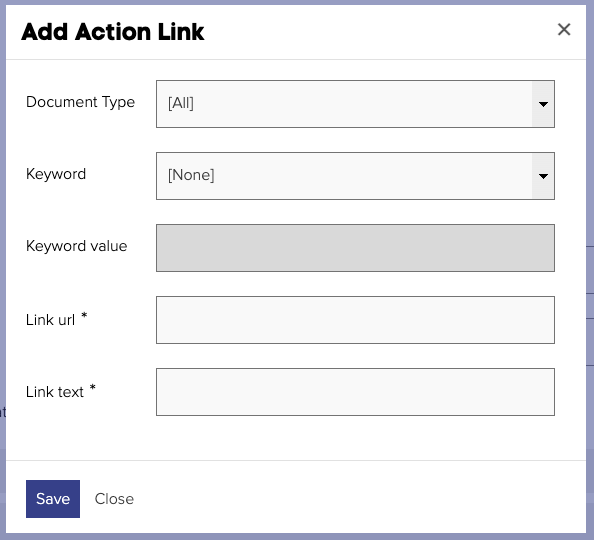
To add a new Action link, click Add Link. This will present a popover, prompting for the following settings:
- Document Type - restrict the form link to display for Documents of a particular Type, or select [All]
- Keyword & Keyword value - restrict the form link to display when the Document has a Keyword of a particular value, or select [None] to present the link regardless of any Keyword value
- Link url - enter the url. This would typically be to a Form or Homepage. The ID of the Document and a secure hash will be automatically appended to the url which can then be used within the Form (see Verifying a Document ID in a Form for more details) or by widgets on the Homepage.
If the url is to a form, it advised that you append/startto the end of the form url to avoid an in-progress form submission for another Document being picked up. For example, if the form url ishttps://my.domain/xfp/form/123, usehttps://my.domain/xfp/form/123/startinstead. - Link text - enter the text to be used when the link is output in the widget.
To edit an Action link, click the pencil icon on that row. You will be presented with the same popover as when adding a new Action link, allowing you to edit the setup.
Action links can be re-ordered using the up and down arrows on each row.
To remove an Action link, click the X icon on that row.
-
To complete your Custom Query Configuration, click Save.
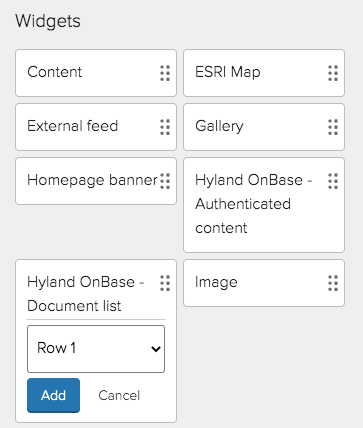
Adding the Document List widget to a Homepage
Once you have created a Custom Query Configuration, you are ready to add the Document List widget to a Homepage and configure it.
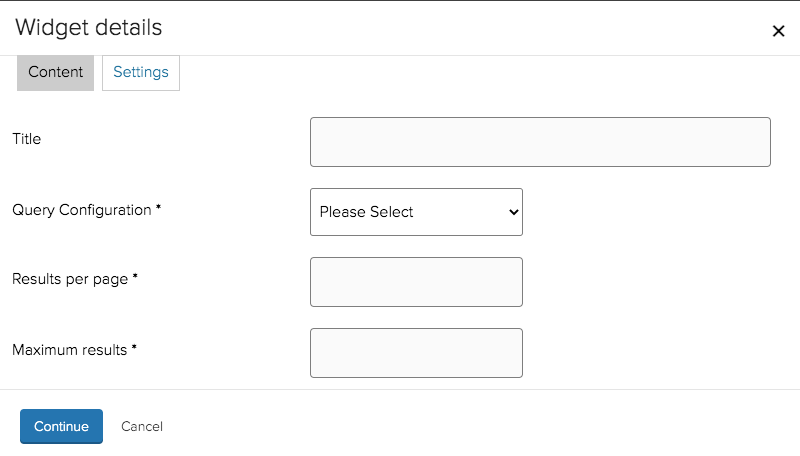
To configure the widget, you will be prompted for the following settings:
- Title - if set, this will be displayed to the portal user above the document list
- Query Configuration - select a Custom Query Configuration to power the document list
- Results per page - maximum number of documents to show on each page of results. Pagination will be available within the widget if the total number available exceeds this.
- Maximum results - the maximum total number of documents to list within the widget
It is possible to use the same Custom Query Configuration in multiple widgets, and multiple Document List widgets can be used on a single Homepage.
Providing a Document download link at the end of a form submission
A Form Action is provided which will generate a secure url from which the user can download a Document. See Generate Document download link
Verifying a Document ID in a Form
When a form is linked to from the Document List widget, the Document ID and a secure hash will be appended to the form url. The Document ID can then be used within the form to perform actions on the Document, e.g. updating it and/or retrieving Keyword values. The purpose of the hash is to detect if the user has tampered with the Document ID in the url in an attempt to provide an update for or gain access to a Document that they should not be able to.
If the user is signed in when viewing the widget, they must be signed when using the form link. If the user is not signed in when viewing the widget, the form link will only be valid for the remainder of their browser session.
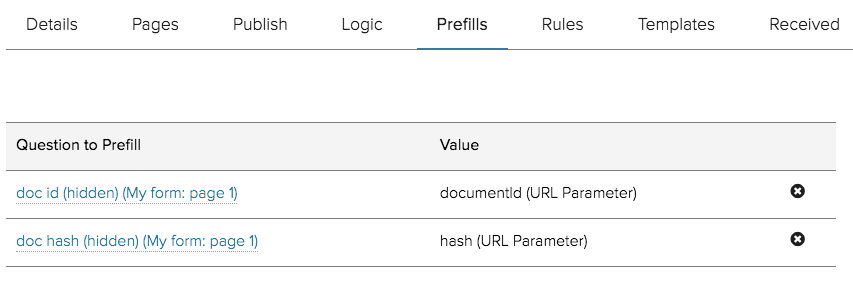
Firstly, you will need to set up URL injection prefills on the form in order to capture and store the Document ID and hash.
The URL parameter keys required for doing this are documentId and hash.
It is advised that these are prefilled into hidden fields on the form.
There is a Form Logic available to verify that the hash and Document ID injected into the form are valid (i.e. that the Document ID has not been tampered with). See Verify Document ID
Secure Document download links
All document download links are protected by a secure hash. The purpose of this hash is to detect if the user has tampered with the Document ID within the url in an attempt to gain access to a Document that they should not be able to.
If a user is signed in when the document link is generated, they will need to be signed every time they wish to access the Document with that link.