Office 365
Authorise a Microsoft Office 365 account for use with Jadu Central event bookings, or your own in-house functionality.
Navigating to the Office 365 area
- Click the Settings icon in the left navigation bar. The Settings menu will open.
- Click the Integrations link in the first group of links. A list of integrations will now be shown.
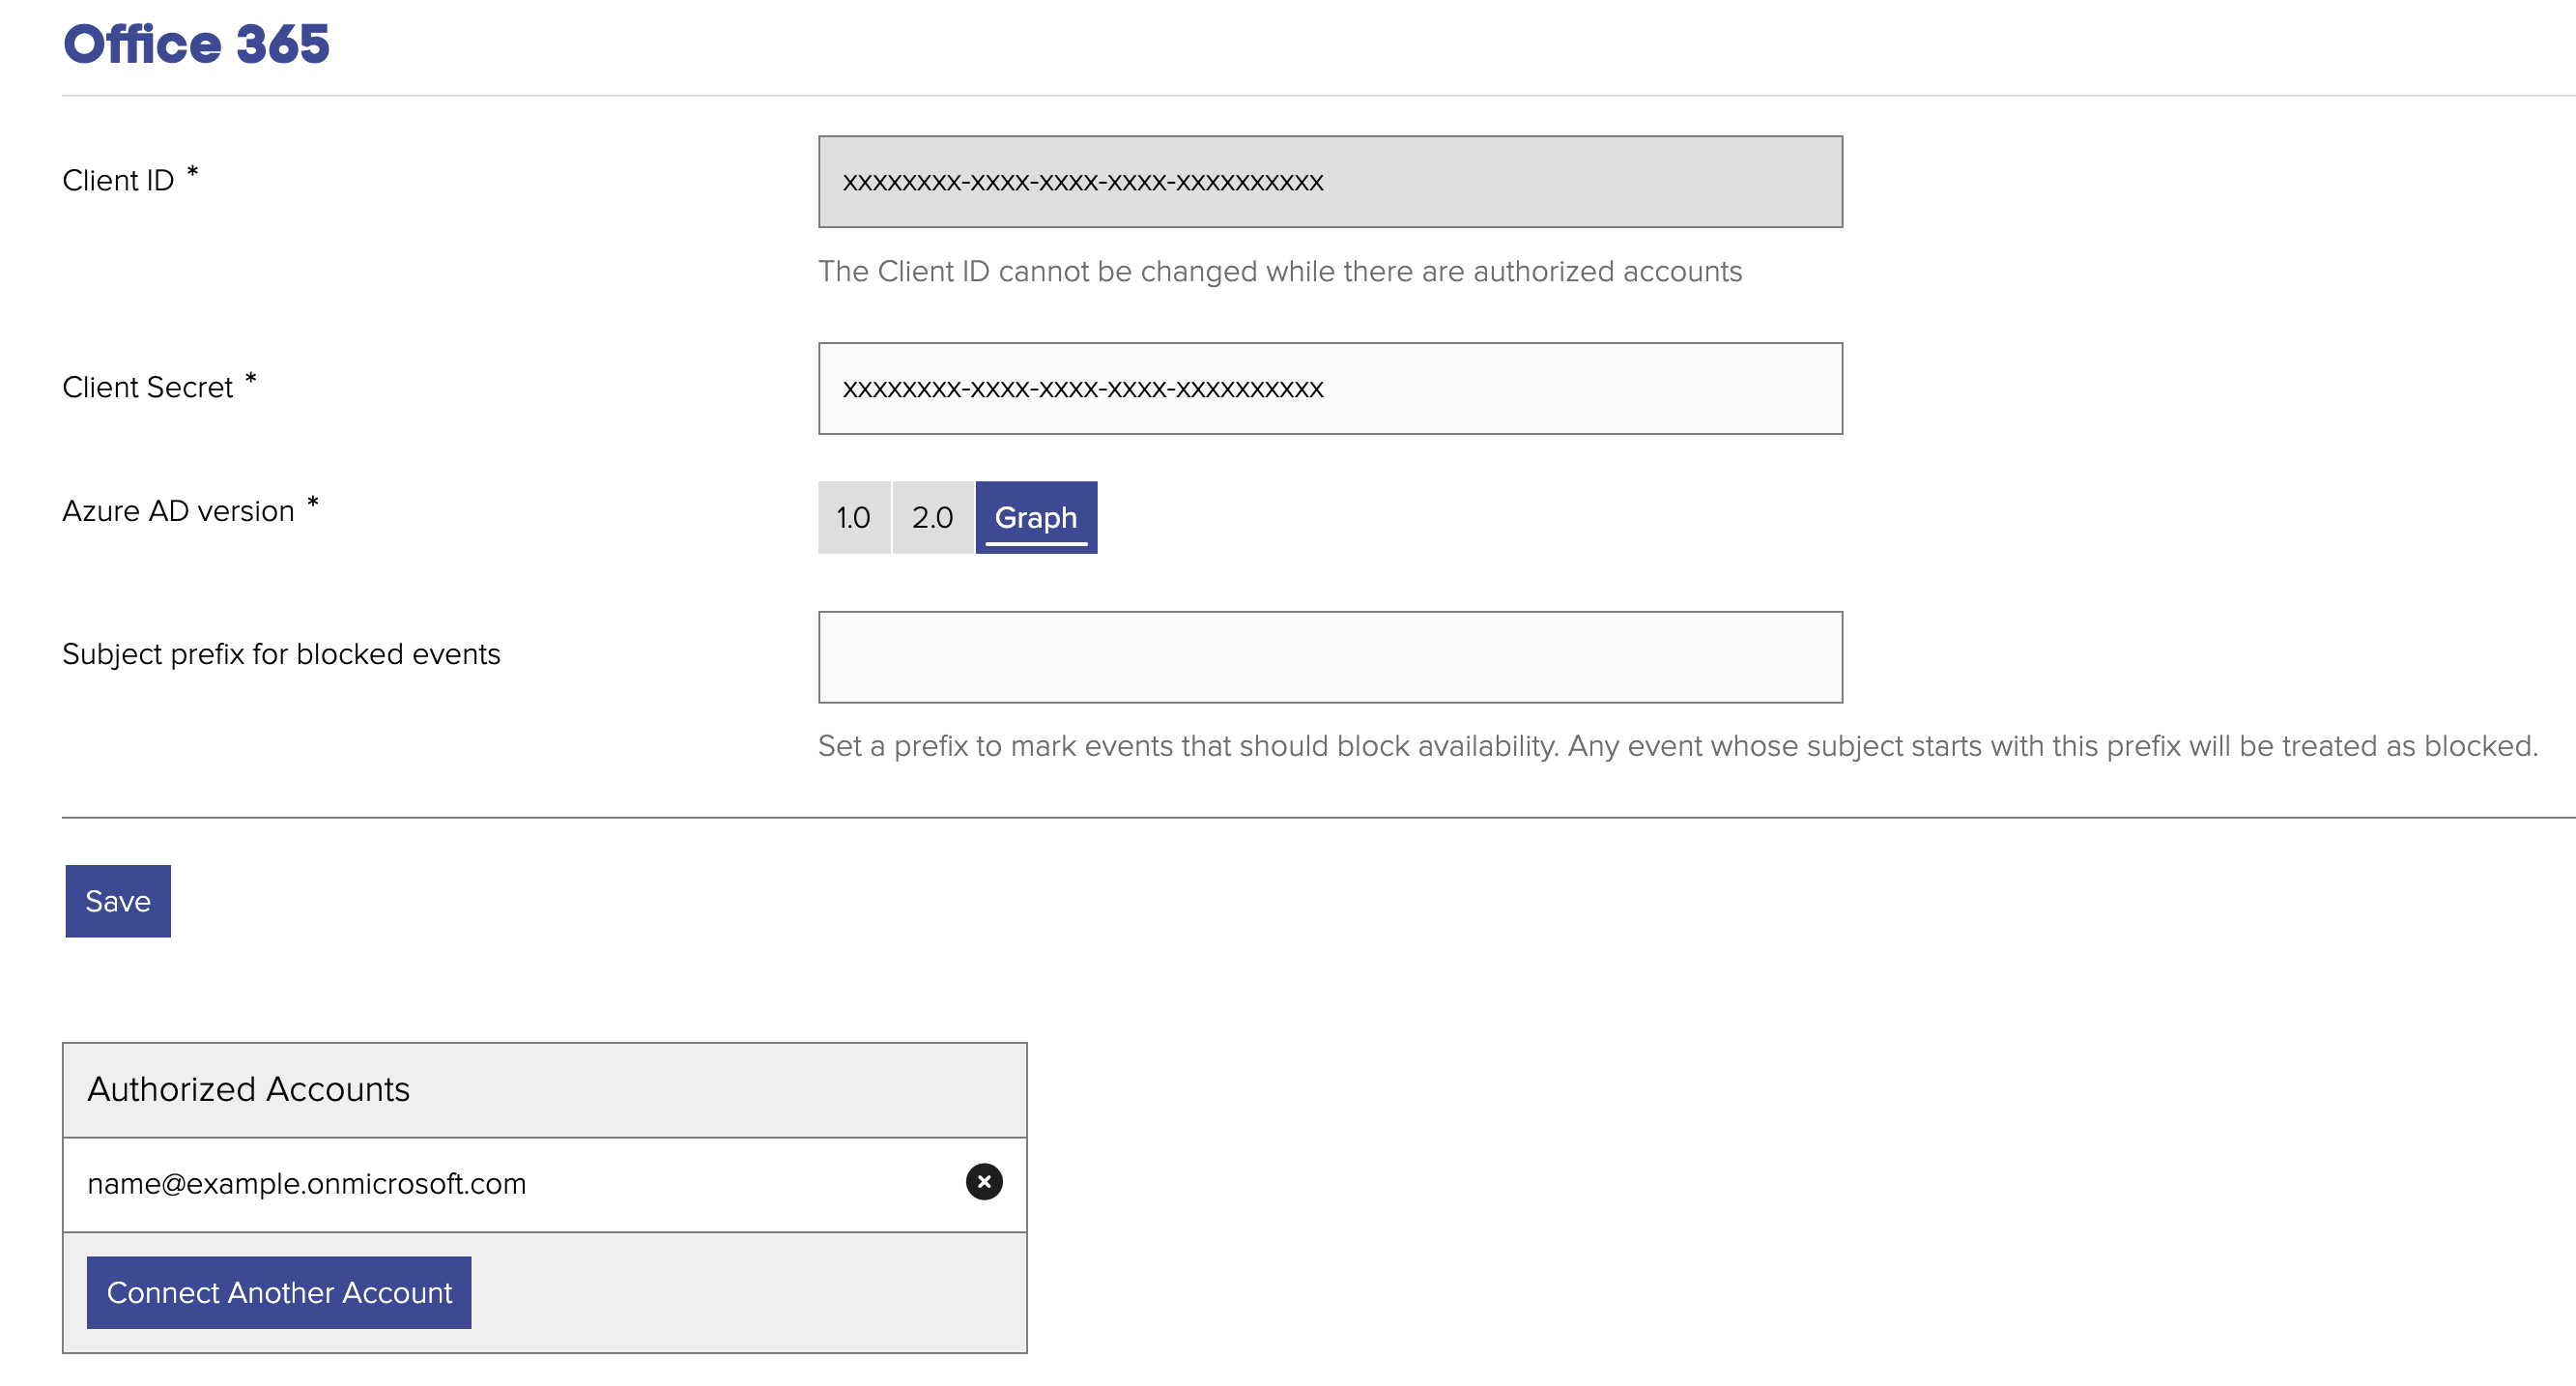
- Click the Office 365 option in the list of integrations. The Office 365 integration form will open.
Setting a subject prefix for blocked events
You can set a prefix to mark events that should block availability. This means that any event in the Office 365 calendar where the subject line starts with the specified prefix is treated as a blocked event. When choosing a prefix, avoid Reserve and Confirm as these are already used for event bookings.
Integration elements
The integration consists of:
- an Event Booking form component to present customers with a calendar from which they can select a time slot
- an Event Booking form component to present customers with a dropdown of their confirmed future bookings
- a Flexible Event Booking form component to present customers with a calendar from which they can select a time slot
- a Flexible Event Booking form component to present customers with a dropdown of their confirmed future bookings
- a Flexible Event Booking form component to present customers with a pricing summary of their bookings
- a form action to move a booking
- a form action to delete a booking
- a form action to amend booking details
- a form action to move a flexible booking
- a form action to delete a flexible booking
- a form action to amend a flexible booking
Setting up Office 365 for event booking calendars
- Go to Microsoft Azure
- Choose ‘App registration’
- Go to ‘New registration’
Branding & Properties
You will need to complete (as a minimum):
- Name
- Homepage URL
https://[your_domain]/jadu/integrations/office365/callback
Authentication
The Redirect URI will be completed for you.
In the Settings tab:
- Within Web and SPA settings ensure Access tokens and ID tokens are selected.
- Within Supported account types ensure Accounts in any organizational directory (Any Microsoft Entra ID tenant - Multitenant) is selected.
Certificates & Secrets
- Create a New client secret
- Copy the Value. You will need to add this to the Integration within Jadu Central.
Tip: Client secret values cannot be viewed, except for immediately after creation. You will need to copy/save the secret when created before leaving the page.
API permissions
- Within Configured permissions, use Add a permission
- Choose the Microsoft Graph API
- Add the following Delegated permissions:
- Calendars.Read
- Calendars.Read.Shared
- Calendars.ReadWrite
- Calendars.ReadWrite.Shared
- Offline_access
- Opendid
- Profile
- Add the following Application permissions:
- Calendars.Read
- Calendars.ReadWrite
Expose an API
- Choose Add a scope
- Complete the mandatory files
- Give consent to Admins and users
Owners
- Add any other people you would like to have access.
To configure the Office 365 integration in Jadu Central
- Go to the Settings menu, then Integrations then the Office 365 integration
- Add the Client ID, found on the application Overview page
- Add the Client secret, copied from Certificates & Secrets
- Choose Azure AD version, Graph
- Press Save
- Press the Connect Account button. Complete the Microsoft authentication process, and accept permissions requested. Once the process is complete, the authorized account will be shown in the list and your service will be restored.
To authorise an Office 365 account
- Sign into Office 365
- Navigate the Office 365 management area in Jadu Central and click the Connect account button
- After the page refreshes, the email address of the Office365 account you are currently logged into will be added to the authorised accounts list.
Outbound connectivity from the server through your firewall will be necessary to login.microsoftonline.com, outlook.office365.com on port 443.
To un-authorise an Office 365 account
- Sign into Office 365
- Navigate the Office 365 management area in Jadu Central and click the cross icon next to the account email address in the list. A new form will open.
- Click the Remove button