Visibility of a page
Jadu Central supports two types of form pages: form specific and shared. Shared pages can be used on any form in the system, whilst form specific pages are restricted to only being used on a certain form.
By default, form pages in Jadu Central are shared across the server, so they can easily be reused on multiple pages. Shared pages also make it quick and easy to roll out small changes across multiple forms, because changes to a shared page are reflected wherever the page is used.
Updating a shared page
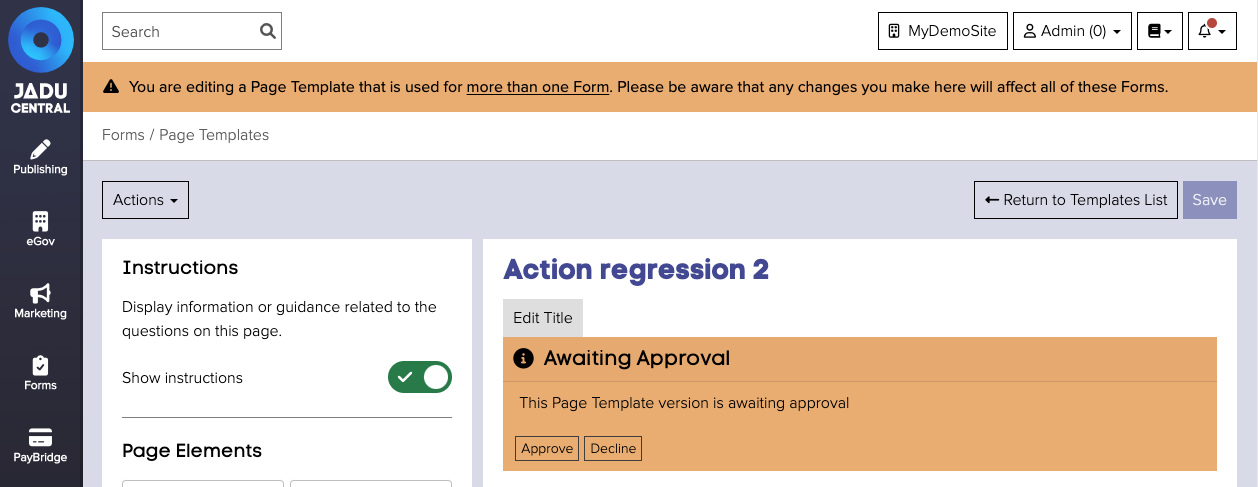
When opening a shared page in the page builder, Jadu Central will display a warning banner at the top of the page, showing that the page is used in multiple forms. You can click the link in this banner to see exactly where the page is used.
Editing a shared page can be done in the same way as editing any other page:
- Open the Pages tab of a form
- Click the Edit button next to the page in the page builder.

Workflow and approval of changes
Some changes may potentially cause adverse effects for forms where the page is used. For example, a particular question may be being sent to Jadu Connect on a certain form, but someone may want to delete the question from the page to suit their own form.
Because of this, Jadu Central requires that any change to a shared page is submitted through workflow, so it can be checked before being made live.
To submit a change to workflow:
- Open a shared page in the page builder.
- Edit a question on the page, and save the change.
- A blue message box will appear at the top of the page, informing you that the change requires approval. Click Submit for Approval.
- If you have permissions to approve, the blue message box will update to show buttons for Approve and Decline. If not, the message box will inform you that your change has been submitted for approval.
- Once submitted, administrators in the next level of the workflow can approve your change by visiting their task list. They will see a task for approving the page, with a link to view the page in the page builder. They can choose to approve the change, or to decline it, at which point they can provide feedback to the person who submitted it.
- Upon approval, all forms using the page will update to show the change.
Creating a form specific page
Form specific pages belong to a single form rather than being shared across the system. These pages are useful if you want to stop other form creators using and potentially changing your page.
You can only create a form specific page when accessing the page builder directly from a form's Pages tab. When creating a page from the page template list view, it is not possible to create a form specific page.
To create a form specific page:
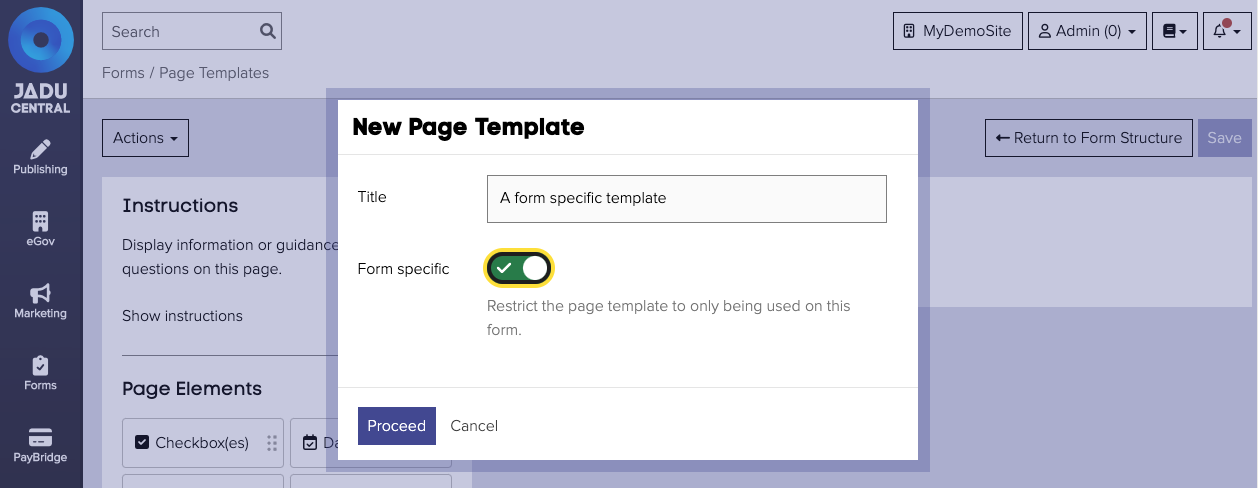
- Open your form, and navigate to the Pages tab.
- In the sidebar, click the Add Page button, then choose Create New. You will then be taken to the page builder. As this has been accessed directly from the Pages tab of a form, you will see the form-specific toggle.
- Toggle the form specific toggle to the on position, and give your page a title.
- Click the Proceed button. Your form specific page has now been created.
Sharing a form specific page
Sharing a form specific page will means other form creators can immediately use the page in other forms, and potentially make changes to its structure.
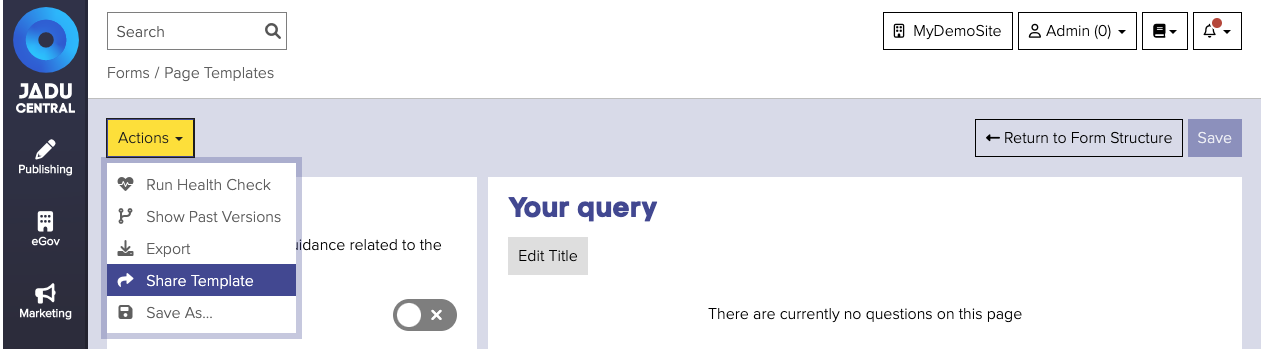
- Open a form specific page in the page builder from the form context. It is not possible to share a form specific page by accessing it from the page templates list view.
- Open the Actions menu and select Share Template from the options provided. A confirmation window will open.
- Confirm the action and the page is now shared.
Making a shared page form specific
You can only make a shared page form specific if it is in use on at most one form.
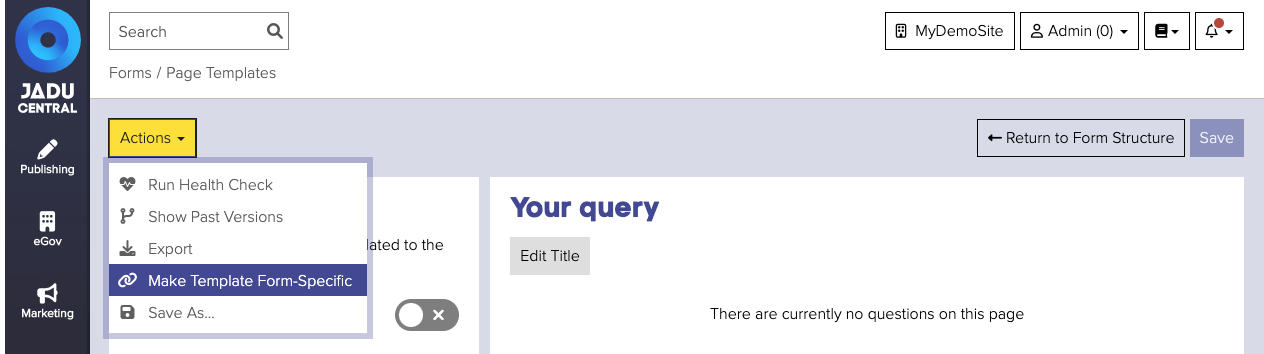
- Open the page in the page builder from the form context. It is not possible to make a page form specific page by accessing it from the page templates list view.
- Open the Actions menu and select Make Template Form-Specific from the options provided. A confirmation window will open.
- Confirm the action and the page is now form specific.