Branching
Jadu Central forms can have different user journeys setup through them.
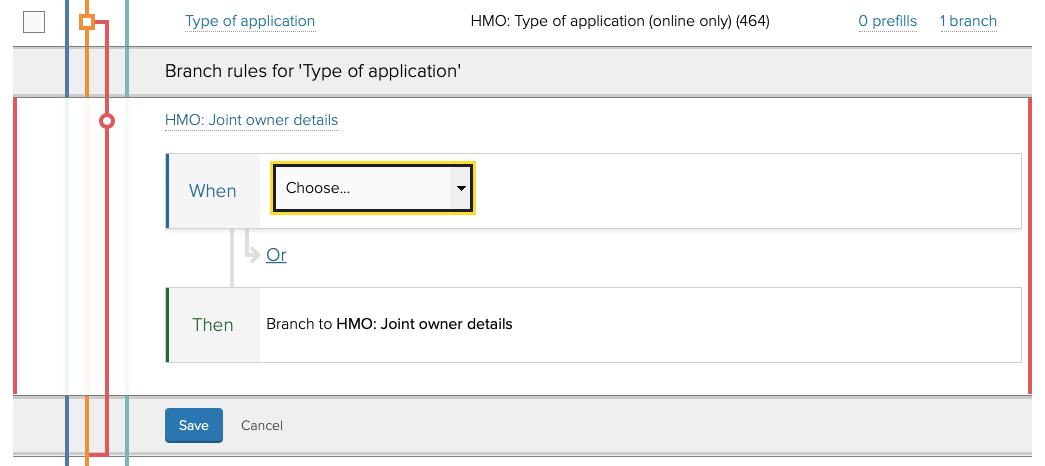
When setting the condition in the branching rule you can choose to branch on any question that has been answered on any page prior to the point in the structure that you are inserting the branching rule.
Alternatively, you can branch on:
- the value of a form logic
- the current day, time or date
- whether a particular page has been visited
- whether the submission is being made by a signed in customer, anonymous customer or administrator
- the submission channel
Creating page level branches
To create a new branch within your form:
- Navigate to the form management area, and open the form you wish to add a page to.
- From the Pages tab, drag the page onto the form structure diagram and drop the page over a Add as a branch from [page title] drop zone.
- Given the page a title and instructions text if required, then click the Next button. The Page branching rules panel will be shown.
- Choose one, or more, "when" conditions.
- Click the Save button to setup the new branch.
All paths through the form will end at the review page to allow the customer to review their responses before submitting.
Execution order of branching rules
Branching rules are executed in the order they were created.
With the first rule created evaluated first, if the conditons are matched that rule is executed.
In the form structure diagram this will be the rule at the bottom of the branching rule list.
Effectively evaluation is run bottom up as seen in the form structure diagram.
Dead-end routes
A dead end route is a route through the form where the user is unable to continue based on the answers they have provided, or other conditions related to the form submission.
Javascript must be enabled on the customers browser otherwise this method will not work.
- Create a new page. Enable the “Show instructions” toggle. Add any details necessary to the instructions page to inform the user why they are unable to continue with their form submission.
- Click the “Insert snippet” button on the editor toolbar and insert the script tag below. This will hide the ‘Next’ button on the dead-end page to prevent the user continuing.
- Click ‘OK’ and then ‘Save’ to save the page instructions.
- Drag the dead-end page you’ve created from the left-hand panel onto the “Form Structure” section. You’ll notice that as you drag the page over the form structure section, you’ll be given options as to where to add the page. You should add it as a branch from the page containing the questions determining whether the user can continue with their submission.
- Click “Save” on the “Add New Page” section and then you’ll be prompted to configure the branching rule (the conditions in which the user is directed to the dead-end page). Configure this as necessary.
- Click ‘Save’ to complete the branching configuration.
// example javascript snippet
<script>
    !function(){var t=function(){var n,e;window.jQuery&&"complete"===document.readyState?(n=window.jQuery,e=null,n(".form--form-builder .form__action--primary button[name=next]").length>0?e=n(".form--form-builder .form__action--primary button[name=next]")[0]:n('button[name="next"].btn.btn--primary').length>0?e=n('button[name="next"].btn.btn--primary')[0]:n("button[name=next].button.button--primary").length>0&&(e=n("button[name=next].button.button--primary")[0]),n(e).remove()):window.setTimeout(t,100)};t()}();
</script>
Customer Masterclass video: Using Conditional Sections and Branching in Jadu Central Forms
Paul Johnson, Customer Success Consultant at Jadu, delivered the session and covered the following topics: using basic branching, using basic conditional sections, using conditional sections to present contact centre scripts, branching vs conditional sections, as well as more complex examples and use cases.
Recorded 6 May 2025
See the video: Customer Masterclass video: Using Conditional Sections and Branching in Jadu Central Forms.