Editing workflows
The Workflow section of the Utilities module allows your organization to set up customized processes for the review and approval of content.
To create a custom workflow, you must be in Advanced workflow mode.
The standard, two-step workflow can not be edited or deleted, and is the fallback if custom workflows are later removed.
Navigating to the Workflow management area
- Click the Utilities icon in the left navigation bar. The Utilities menu will open.
- Click the Workflow link in the third group of links. The list of workflows will now be shown.
Workflow fields
| Field | Notes | Required? |
|---|---|---|
| Title | The name of the workflow | ✅ |
| Admin groups | The privilege groups assigned to the workflow. | ✅ |
| Prevent editing of content progressing through workflow | Whether content should be locked once it is submitted for approval. | |
| Content types | The content types that will be subjected to this workflow. | |
| Use alerts | Whether amber and red alerts are enabled. | |
| Send emails | Whether emails are sent relating to amber and red alerts. | |
| Amber alert after | How many days after the task was created to trigger the amber alert. | |
| Amber alert sent to | List of administrators to send the amber alert to. | |
| Red alert after | How many days after the task was created to trigger the red alert. | |
| Red alert sent to | List of administrators to send the red alert to. | |
| Use escalations | If enabled, will escalate the task to the specified admin(s) after the specified time limit. | |
| Escalate after | How many days after the task was created to trigger the escalation. | |
| Escalate to | List of administrators to escalate the task to. | |
| Step | The groups of administrators each content item must pass through before it is considered approved. | |
| Live | Whether the workflow is in use. |
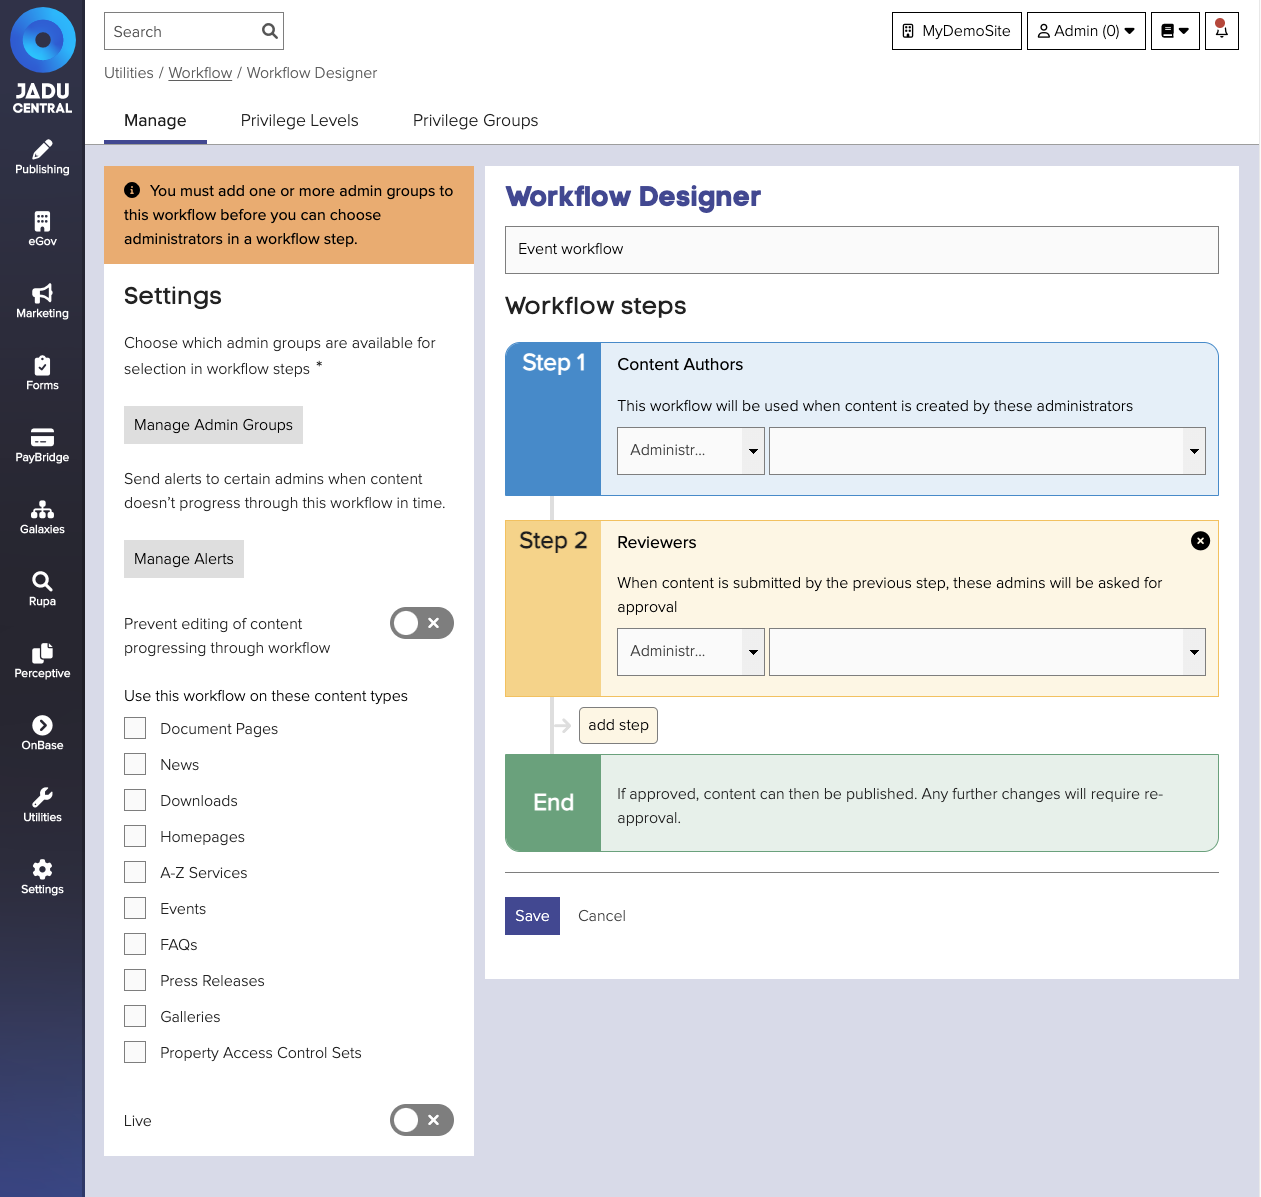
Setting up steps and approvers
The administrators available to be assigned to workflow steps, or to receive alerts and escalations, are defined by the privilege groups assigned to the workflow.
To add a group, try the following:
- Open the workflow record, so that it can be edited.
- Click the Manage admin groups button. The Assign workflow groups panel will open.
- Select the groups assigned to this workflow by checking the checkbox.
- Click the Save button to close the panel. The group's administrators can now be assigned to workflow steps.
- Click the Save button to save the changes.
The steps of the workflow are shown in the order in which content will passed through them. Step 1 will always be the content author.
Adding steps
Adding additional steps to the workflow is easy.
To add a step, click the Add step button. Select the privilege level using the dropdown, and then select available administrators from the list provided.
Re-ordering these steps will effectively re-order the publishing process.
Setting up alerts and escalations
Alerts and escalations define what happens within a workflow publishing process in terms of reporting un-actioned tasks.
To set up alerts and escalations in your workflow, try the following:
- Open the workflow record, so that it can be edited.
- Click the Manage alerts button in the left panel. The Define workflow alerts panel will open.
- Update the field values as required, and click the Save button. The Define workflow alerts panel will close.
- Click the Save button to save your changes.
Customer Masterclass: Understanding Jadu Central Content Workflow
With Paul Johnson, Training Manager and Content Strategist, Jadu.
A overview of the key features of workflow in relation to Jadu Central content. How to use them effectively and extend the out-of-the-box process with your own custom workflows.
- Understand the basic default workflow
- Understand how to create custom workflows
- Understand collaborative workflows
- Understand how to use workflow to override user privileges
Recorded 27 March 2024