Managing user accounts
On registration, all details captured from customers are stored securely in the Jadu Central database.
User account reporting
A number of reports are available in our user reports section including:
- Dormant users in period
- New users in period
- Successful user logins in period
- Unsuccessful user logins in period
- User login summary
Login data is stored for 1 year, after that point it is automatically deleted by the application.
Navigating to the user account management area
To query your user accounts, try the following:
- Click the Marketing icon in the left navigation bar. The Marketing menu will open.
- Click the Registered users link in the third group of links. A list of registered users will now be shown.
As user account details are stored in a secure format, partial match searches can not be performed on user accounts.
This means that unlike other searches within Jadu Central, a search for "sarah@" will not return any results, where as a search for "sarah@example.com" would return a matching user.
User fields
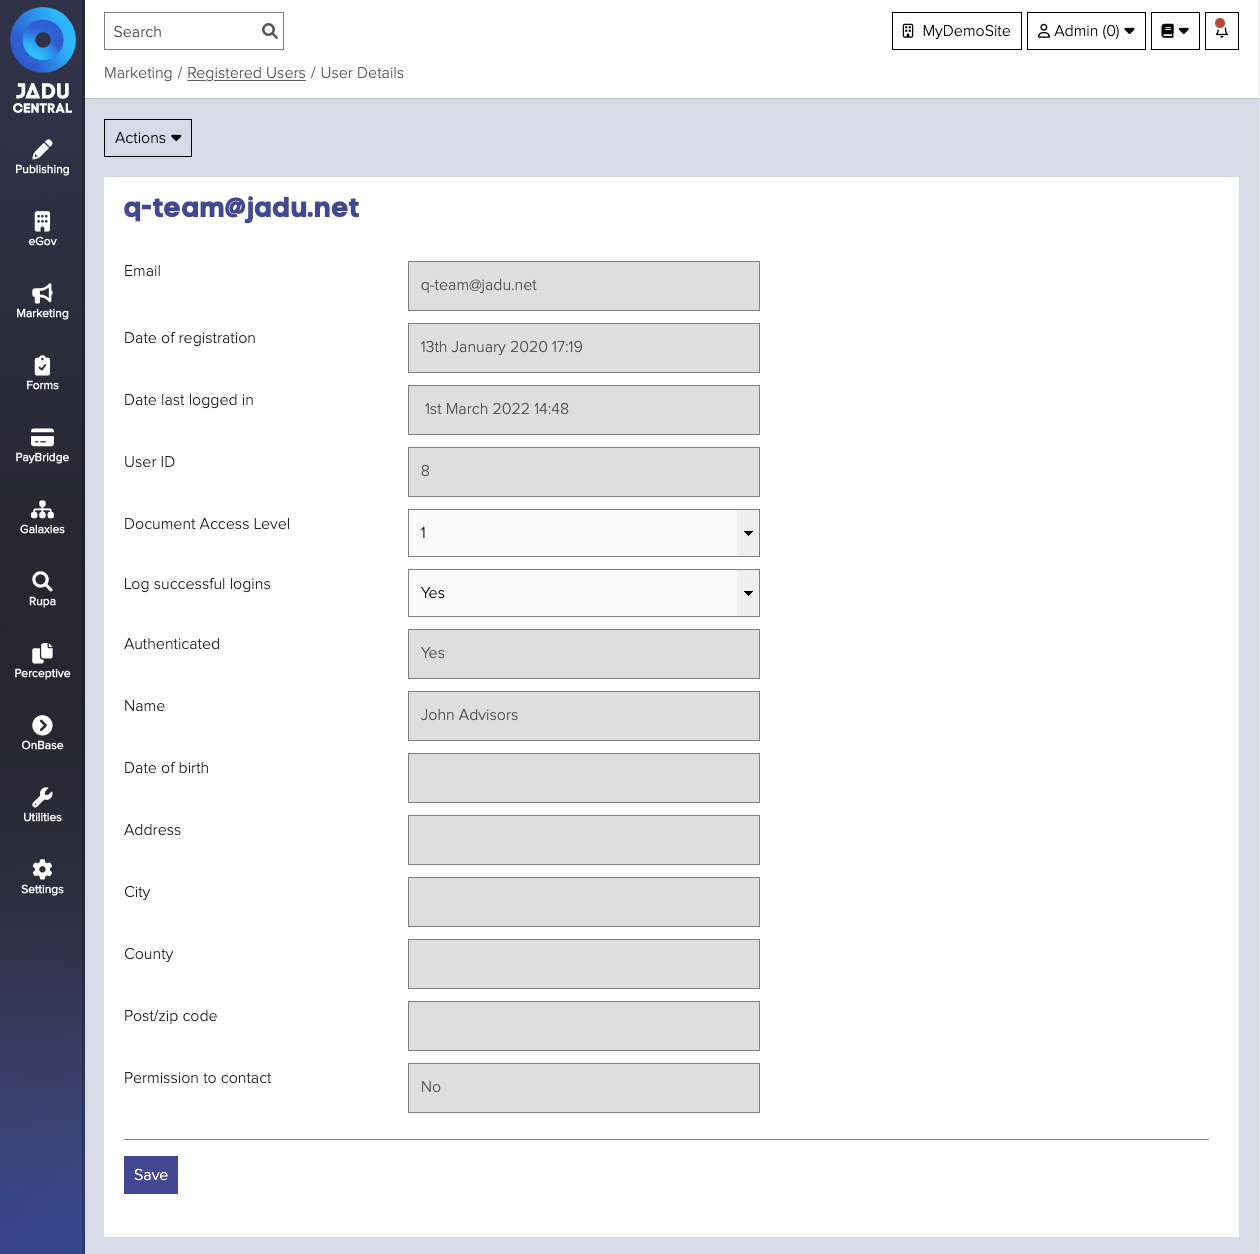
| Field | Notes | Required? |
|---|---|---|
| The email address that any correspondence will be delivered to and which they will use to authenticate themselves when logging into your organization's website. | ||
| Authenticated | Whether the user has clicked on the authentication link with the email they received upon site registration (if enabled). | |
| Date of registration | The date and time of their initial registration. | |
| Date last logged in | When the user actively logged in to your organization's website. | |
| User ID | Numerical identity given to the user by the application. | |
| Document Access Level | Document privacy level of this user, see Document header fields for more information. | |
| Log successful logins | Whether to log this users successful logins. |
Deleting user accounts
Users can not delete their account from the user account management page. If a user requests that their account is deleted, as provided for under GDPR regulations, this can be done from the user account management area.
See Bulk deleting content for details.
Form submissions
When a user is removed from Jadu Central, the application will check to see if that user has any associated forms or payments. A note of the deletion request is made so that a staff member can view the relevant forms.
Deletion requests will be listed as either:
pending- The forms of this request need reviewing, before data can be cleared.scheduled- This request has been reviewed, and will be processed in the next ten minutes.
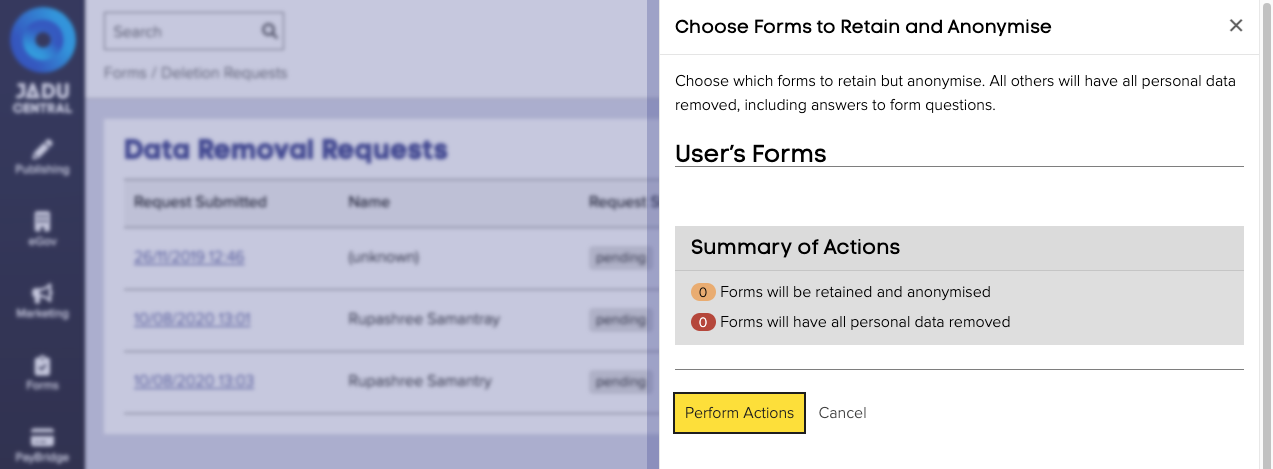
To review forms associated with a deletion request:
- Click the Forms icon in the left navigation bar. The Forms menu will open.
- Click the Data Removal Requests link. A list of deletion requests will now be shown.
- Click the View Forms link next to a record. The sidebar will open, showing the forms associated with the user.
- For each form, choose Delete all personal data or Retain personal data and anonymise form. To help you decide, you can click the reference for the submission to view the received form. You may wish to retain information if the submission is necessary to continue providing a subscription or service to the customer.
- Once you have decided what to do with each form, click Perform Actions. The sidebar will close, and the status of the request will change to scheduled. The request will then be processed in the next ten minutes.
Deleting all personal data is equivalent to running a 'user data' retention policy on the form. All answers, logs, files and user information will be removed. Choosing Retain personal data and anonymise form will cause the submission to be disassociated from the customer, but all answers and files will remain intact.
Setting a user's document access level
Document Access Level is connected with document privacy levels.
The default is Access level 1, which allows a user to see all content on your website that doesn’t have a privacy level applied to it.
To change a user's document access level, try the following:
- Navigate to the user management area.
- Find the user in the list and click their email to open their record.
- Select the user's new access level from the dropdown. Level 1 is public, Level 5 is the most secure.
Contact history
The Contact Manager is essentially a visitor manager system that gives you the ability to record details of interactions with your registered users.
This can be helpful for tracking any potential problems you encounter with individual registered users and communications between your organization's website administrators (or its Webmasters) and your customer. This information is stored along side a user's profile.
To add a record to a user's contact history, try the following:
- Navigate to the user management area.
- Find the user in the list and click their email to open their record.
- Click the Actions button, and select Browse contact history from the options. The contact history area for this user will now open.
Contact history fields
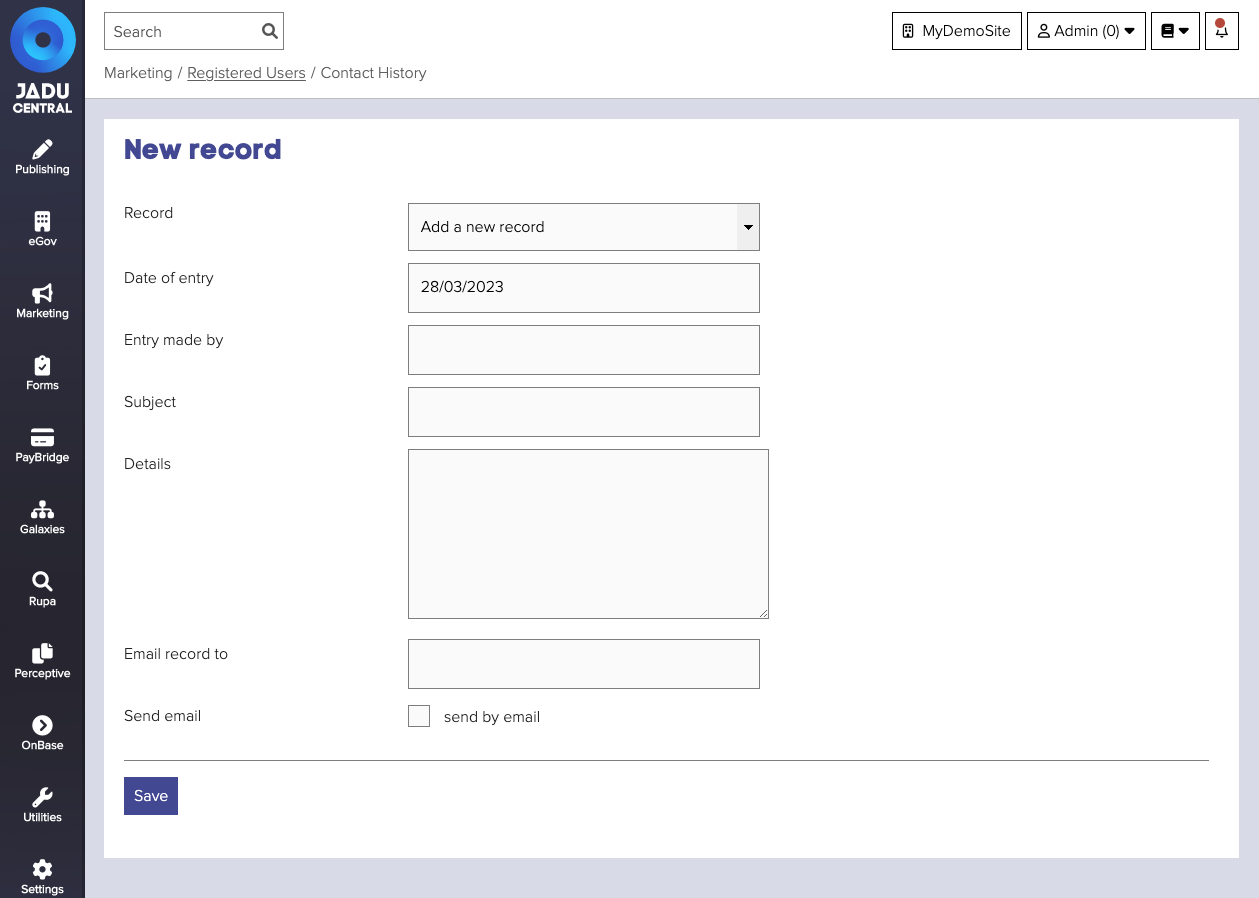
| Field | Notes | Required? |
|---|---|---|
| Date of entry | The date the record was created. When Adding a new record this will default to today’s date. | |
| Entry made by | Option for the person creating the record to provide their details. | |
| Subject | A meaningful subject title for the record, eg. "A problem registering". | |
| Details | The body of the record. What the query might be, what course of action has been suggested etc. | |
| Email record to | Comma separated list of email addresses to send this record to, if "Send email" is checked. | |
| Send email | Option to email a copy of the record being created to perhaps the customer as confirmation or to a colleague to help with the query. |