Inviting users
When Gateway is enabled, any user accessing the website from an IP address that has not been whitelisted will need to authenticate before they can see site content.
Users must receive an invite in order to create an account. Invites can either be created as one-off entries, or in bulk by uploading a CSV containing user details.
Navigating to the User Invites area
- Click the Gateway icon in the left navigation bar. The Gateway menu will open
- Click the User Invites link, in the first group of links. A list of user invites added to the application will now be shown
User Invite fields
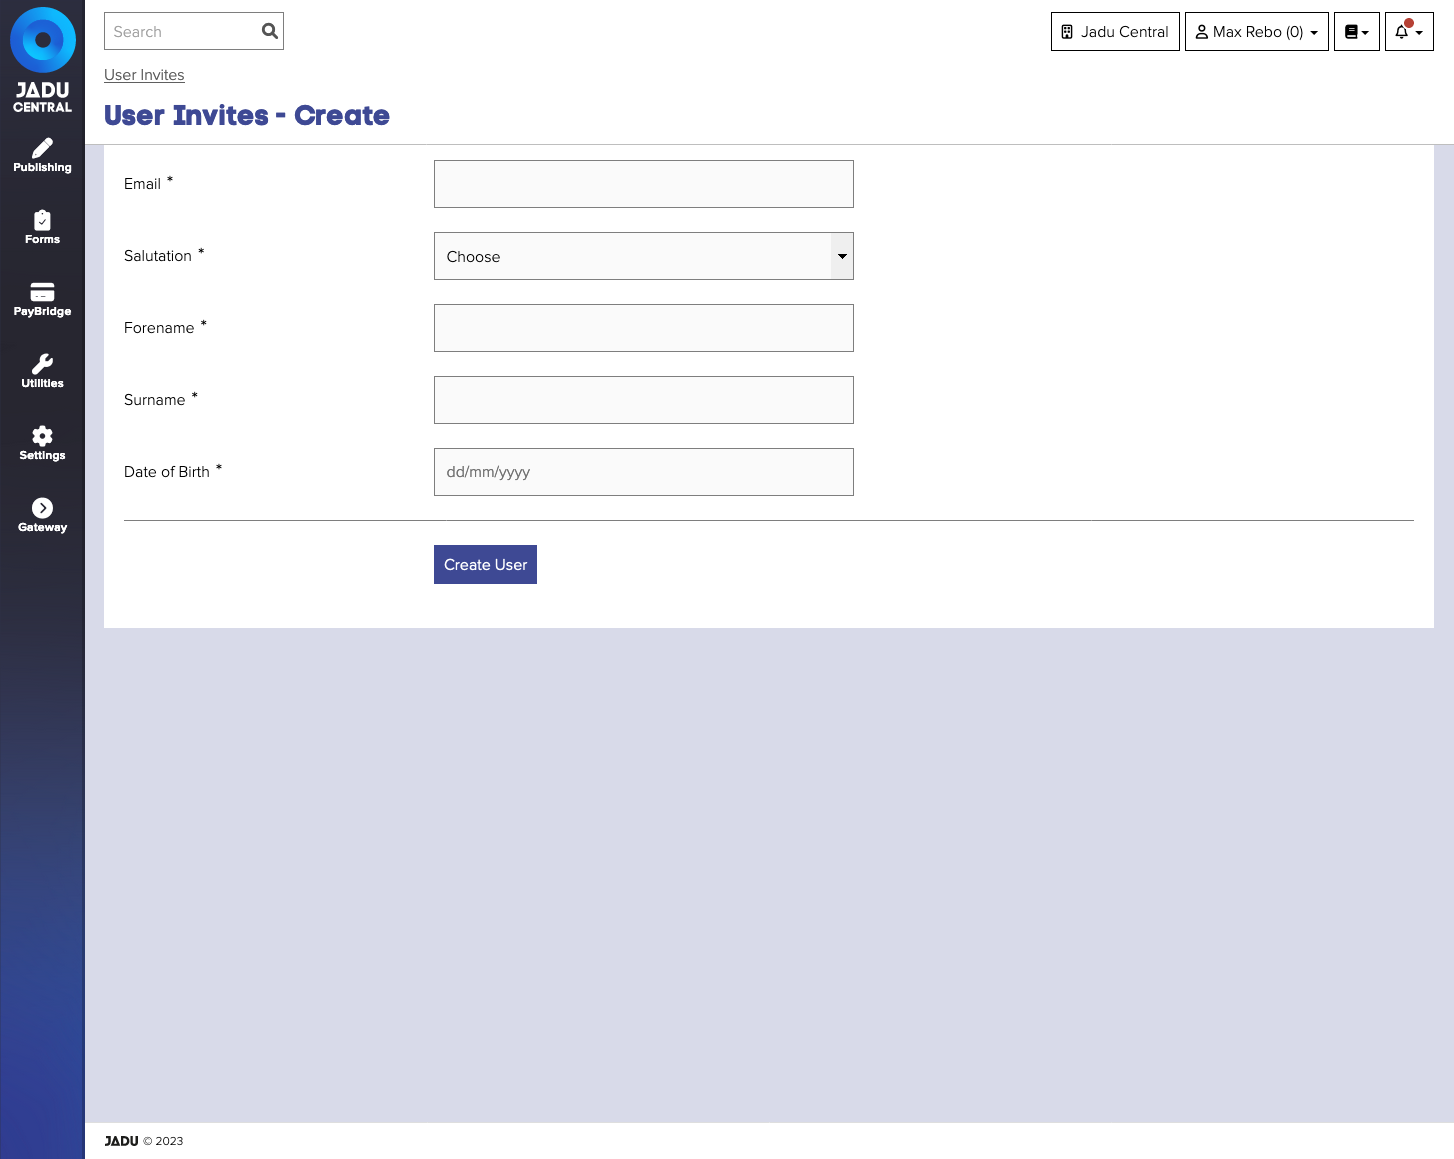
| Field | Notes | Required? |
|---|---|---|
| The email address to send the user's invitation to. This will be used as their username when authenticating | ✅ |
The exact fields available will vary depending on the configuration of your site. You can enable and disable fields to collect in the Marketing > Register Prefs area.
Disabling a user
To disable a user:
- Navigate to the User Invites management area and open their record by clicking their email address in the list. The user record will open.
- Click the Actions menu and select Disable User from the available options. A confirmation message will open.
- Click the Disable button. The message will close, the page will reload and a success message will be shown. The user will now be disabled.
Once disabled, a user will not be able to login and access the site. However, their record will remain and can be reenabled at a future point.
Checking the status of an invite
To check the status of an invite:
- Navigate to the User Invites management area and open their record by clicking their email address in the list. The user record will open.
- An information panel is shown above the record form. The status of the invite is shown in the information panel.
Resending an invite
To resend an invite to a user:
- Navigate to the User Invites management area and open their record by clicking their email address in the list. The user record will open.
- Click the Actions menu and select Resent invite from the available options. A confirmation message will be shown.
- Click the Resend button. The message will close, the page will reload and a success message will be shown. A new invitation email will be sent to the user's email address.
If you change the user's email address before they have accepted the invitation, a new invitation email will automatically be regenerated and sent to the new email address.
Deleting an invite
To delete an invite:
- Navigate to the User Invites management area and open their record by clicking their email address in the list. The user record will open.
- Click the Actions menu and select Delete invite from the available options. A confirmation message will be shown.
- Click the Delete button. The message will close, the page will reload and a success message will be shown. The invite record, and associated user record, will be deleted.
Deleting an invitation record will delete the associated user record. If you need to prevent a user from logging in to the site, but need to preserve the user's record, you can instead disable their account.
Bulk invites
If you don't want to manage invitations one by one, you have the option to invite people using a CSV spreadsheet. This will allow you to quickly create multiple invitations at the same time.
Navigating to the User Invites - Bulk Upload area
- Click the Gateway icon in the left navigation bar. The Gateway menu will open
- Click the User Invites - Bulk Upload link, in the first group of links. The bulk upload form will now be shown.
Downloading an example CSV file
To download an example CSV file:
- Navigate to the User invites - Bulk Upload management area.
- Click the Actions menu and select Download example CSV from the available options. The browser will begin to download the example file.
- Once the file has downloaded, open it in your spreadsheet editing software - such as Microsoft Excel or Google Sheets.
The structure of the CSV file will vary according to the configuration of your user records. Before uploading a new bulk import, download the example file and compare the structure.
Checking the status of a previous import
To check the status of a previous import:
- Navigate to the User invites - Bulk Upload management area.
- Click the Previous Imports tab. The list of attempted uploads will open.
- Identify the previous import in the list by the Upload Name field. The status of the import is shown in the Status column. If the upload has been attempted, but the process encountered an error, a message will be shown in the Error message column. Resolve the error and re-attempt the import.
User Invite - Bulk Upload fields
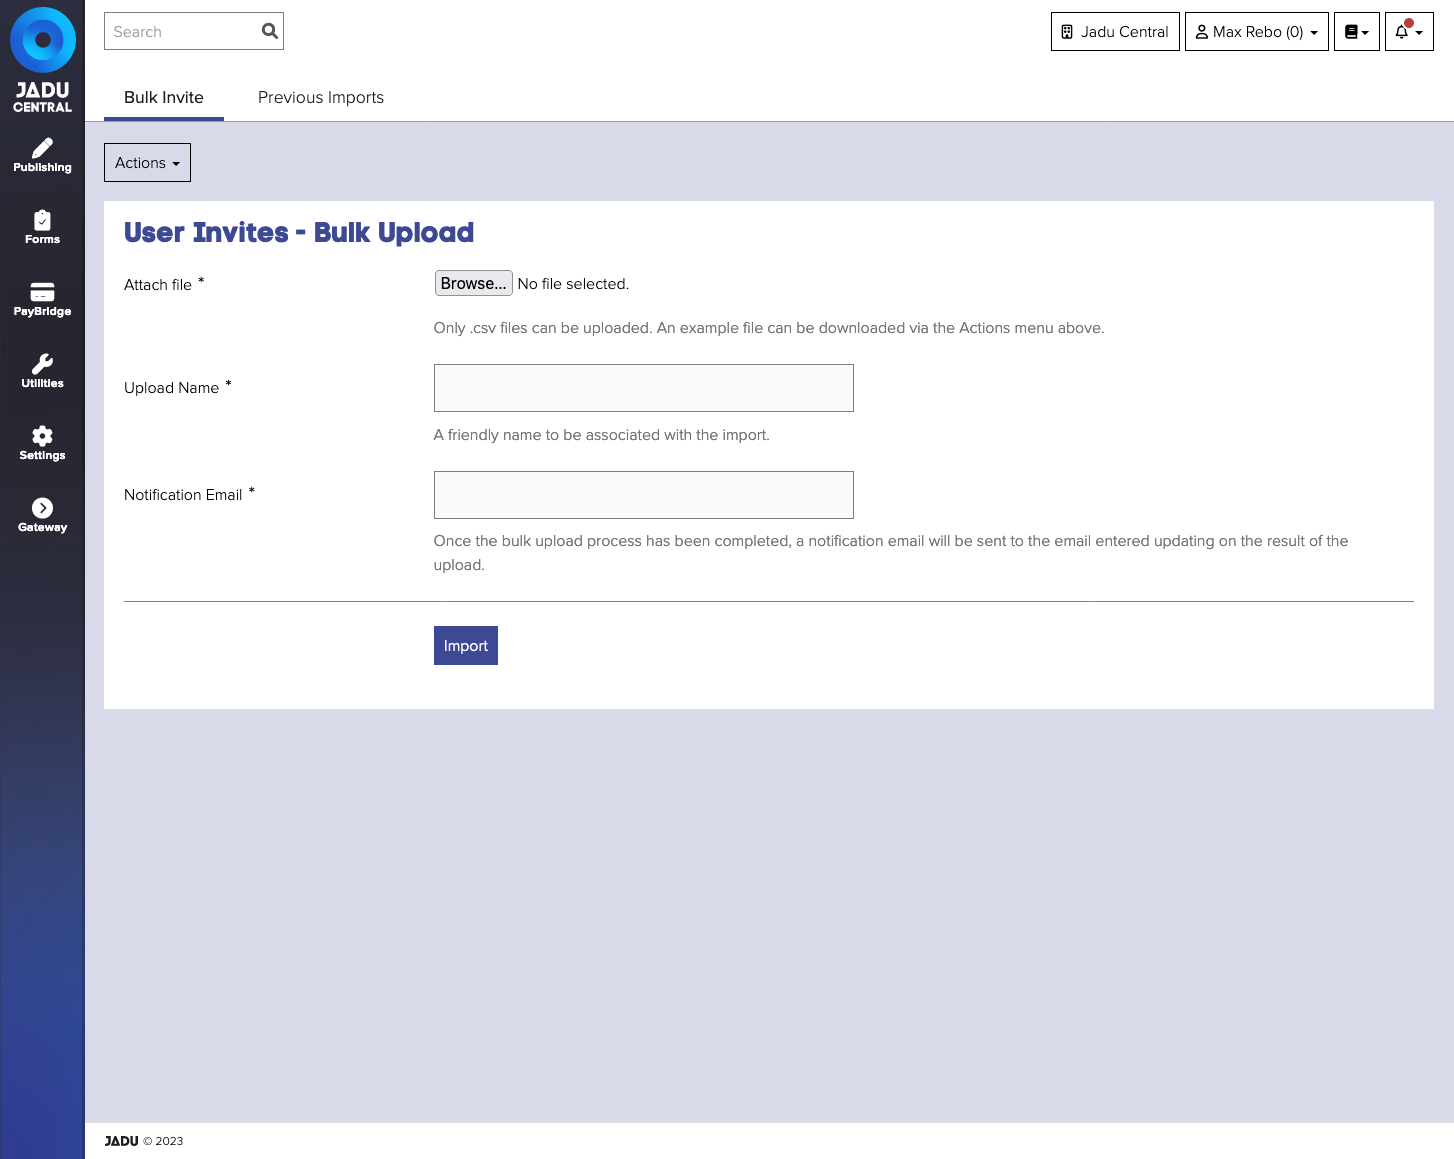
| Field | Notes | Required? |
|---|---|---|
| Attach file | The CSV file containing the details of users to be invited | ✅ |
| Upload Name | A friendly name to be associated with the import, so you can easily check the status of the upload in the future. | ✅ |
| Notification Email | The email address that will receive a notification email once the bulk upload process has completed | ✅ |