Case type import & export
Exporting a case type
You can export a case type from Jadu Connect and then re-import it into a different Jadu Connect account.
As an example, you might configure a Waste case type in your UAT Jadu Connect account and then want to migrate it to your live one.
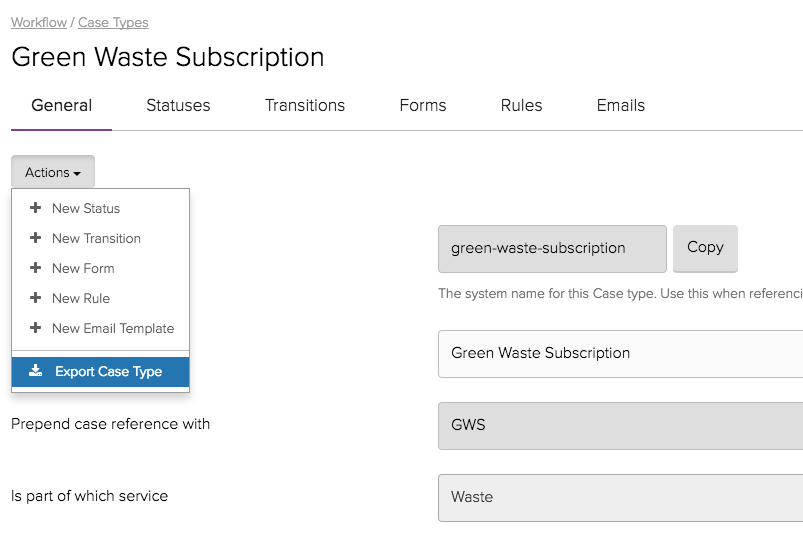
Open the case type you'd like to export, click the Actions button and then Export Case Type:
This will open a modal explaining what will be included in the export; you can then click Export to download a file containing your case type's configuration:
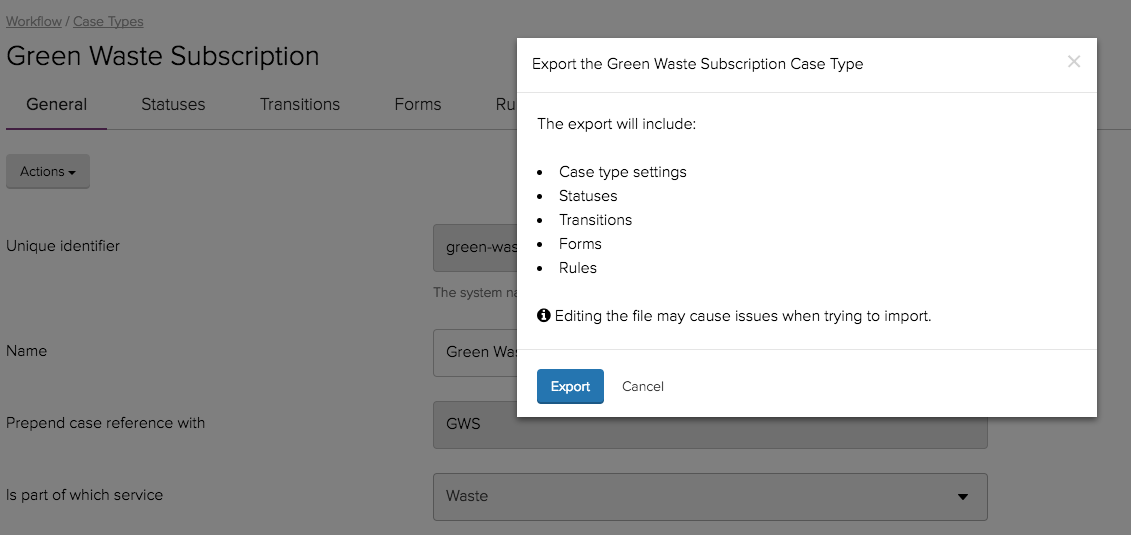
You'll need to keep the downloaded file safe, so you can import it into your other account later (see below). We don't recommend editing the export file downloaded, as it may cause issues when you try to re-import it later.
Importing a case type
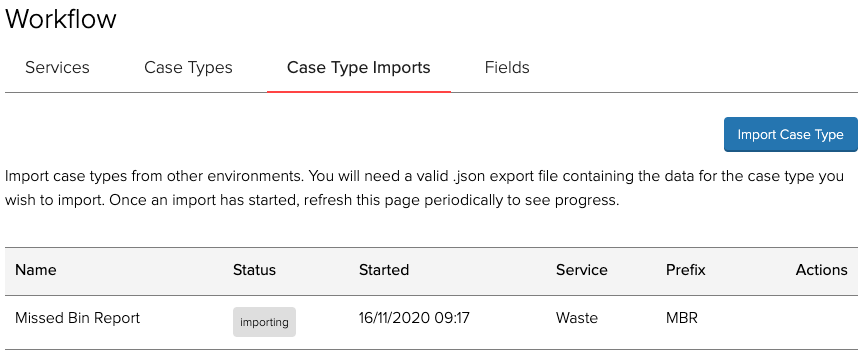
Go to Settings > Workflow, open the Case Type Imports tab and click the Import Case Type button:

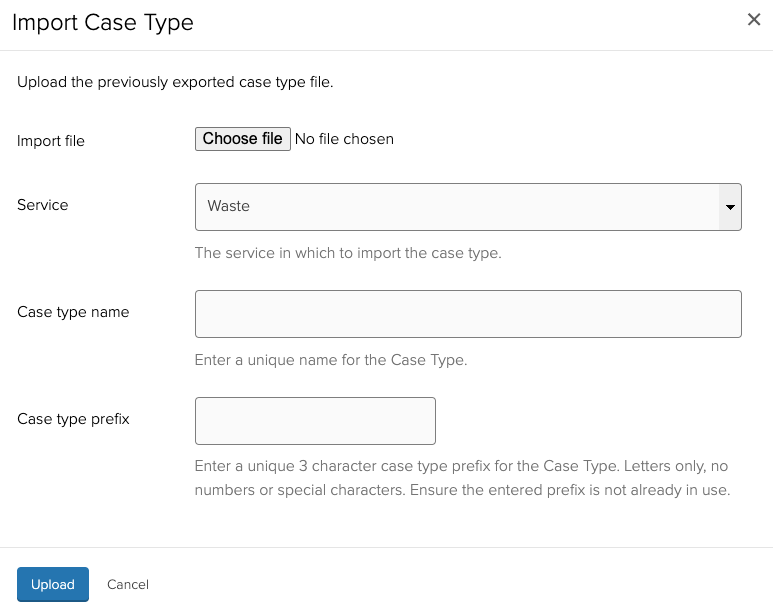
Clicking this button will open a modal where you can start the import process:
- Upload a JSON
Import filecontaining the data for a previously exported Case Type you wish to import. - Select the
Servicethe Case Type will belong to once it is imported. - Customise the
Case type name, overriding the original name from the export file. - Also customise the
Case type prefix, which cannot be in use by any existing Case Type or any other import.
After clicking Upload in the modal you will be redirected back to the imports list, were you will see your import.
The status of your import will be set as importing during the time it takes to process the import in the background.
After some time, you can refresh the page in order to see if it has been progressed.
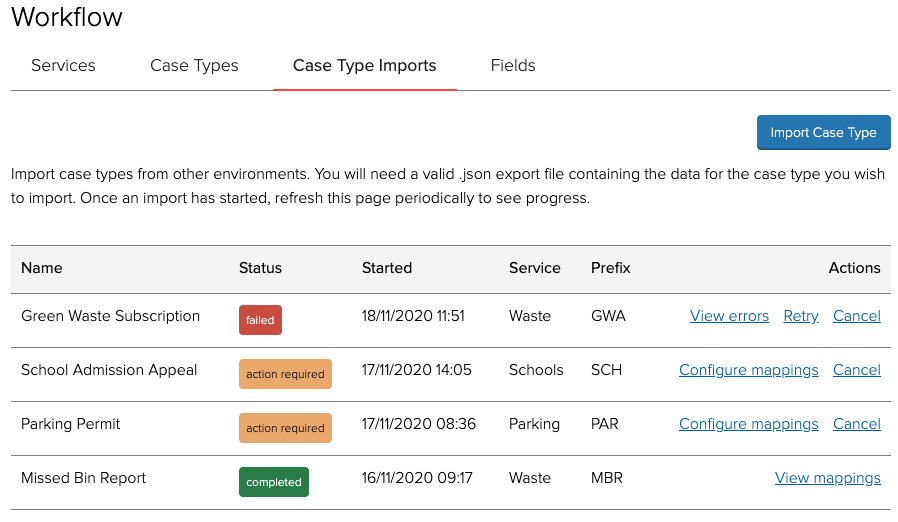
Once the background process completes, there are three possible outcomes:
- If something goes wrong in the background processing and/or the contents of the JSON file are invalid, the import
status will be set as
failed. In theActionscolumn there will be links toView errors, toRetrythe import and toCancelthe import. - In most cases, what will happen is there will be some items in the imported Case Type that do not exist in your
system yet, so you need to configure them, and the import will be marked as
action required. At this point, theActionscolumn will contain links toConfigure mappingsand toCancelthe import. - If everything goes well and the imported Case Type is fully compatible with your environment, the import will be
marked as
completed, and the Case Type will have been created. After the import is done, the only link in theActionscolumn will beView mappings.
In the following sections we will explain each of the actions you can perform on the import in the different stages.
Cancelling an import
When the import is in the failed or action required states, the Actions column will contain a link to Cancel
the import. When clicking this link, you will see a confirmation modal, and if you confirm the action, the import will
be deleted from the system. If you cancel an import, the prefix you gave it will become free again, so it can be used
in another import.

Configuring import mappings
When you import a Case Type into an environment, most likely there will be some items in the import that are missing in the system. In that case, you need to decide what to do with each of them.
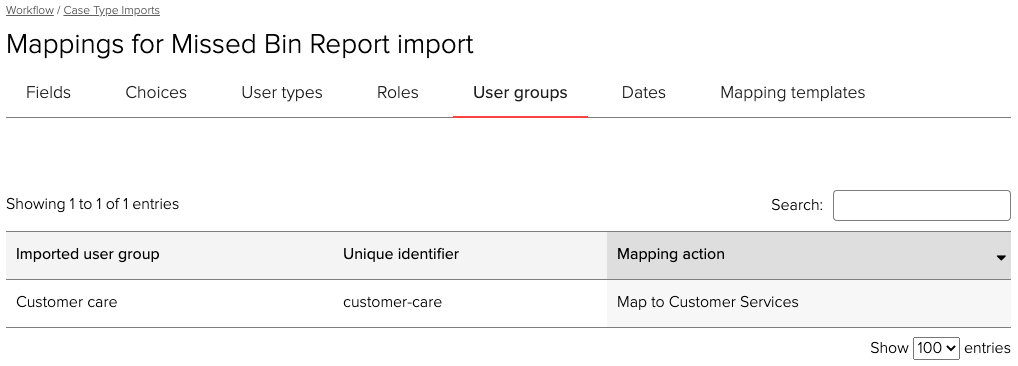
When you click on the Configure mappings action for your import, you will be taken to the mappings page, where there
are separate tabs for each type of item that may be imported. Each tab that requires attention will be marked with a
warning sign, and there will also be a panel at the top, where you can see a list of those types requiring action.
In each tab, there will be a list with all the required mappings. Initially all mappings are marked as not mapped,
and in order to complete the import, you need to edit all of them, until none is left unmapped.
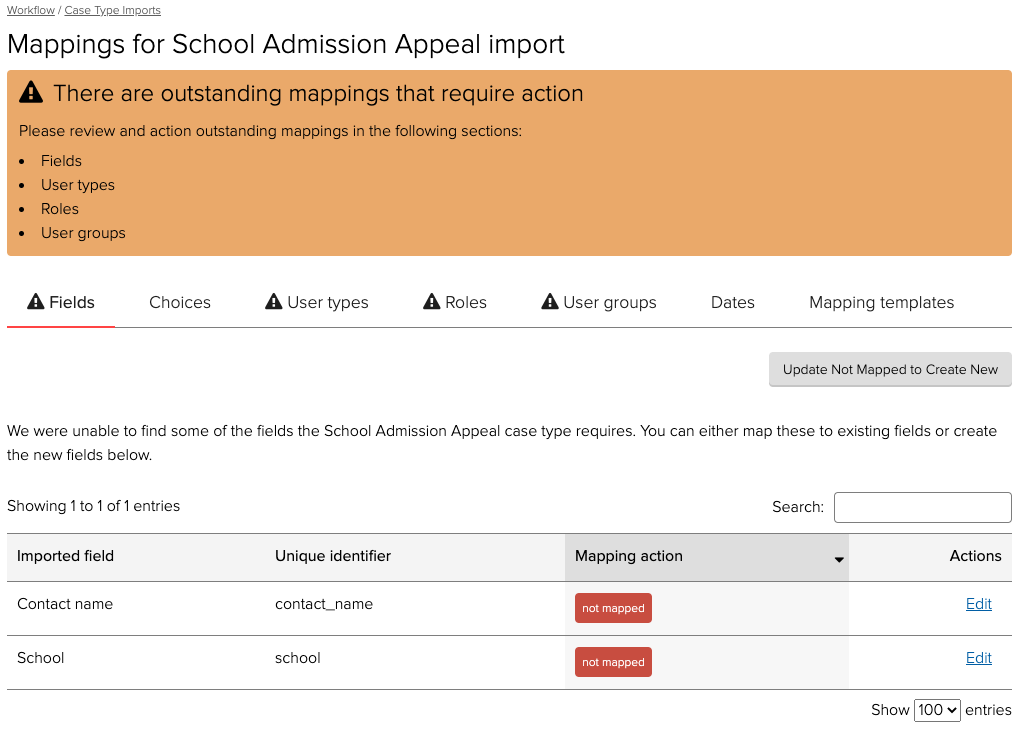
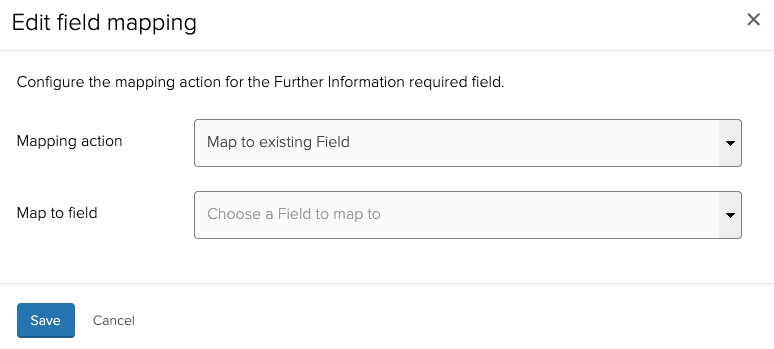
In order to configure a mapping, you need to click Edit in each one of them, which will open up a modal where you
can specify which action you want to perform for that mapping, among the following options:
Map to existing ...: if you select this action, the missing item will be replaced by an equivalent one that already exists in your environment.Create new ...: by selecting this action, the missing item will be created in your environment.Ignore this ...: when this action is selected, the import process will simply ignore the item.
Note that only a subset of those actions will be available for each specific mapping. The rules that dictate which actions you can select are the following:
Fieldsalways allowMap toandCreate new. In order to map an imported Field to an existing Field, they must be of the same type, and for Choice Fields in particular, they must have the same multiplicity as well. New fields will be visible to all roles and available to all services.Choicesin principle also allowMap toandCreate new. However, if you choose the actionCreate newfor the mapping of the Field the Choice belongs to, then the only option available for the Choice mapping will beCreate newas well.User typesonly allowMap to.RolesallowMap toandIgnore, unless they are used in a Rule in the imported Case Type, in which case they allowMap toonly.User groupsonly allowMap to.Datesalways allowMap toandCreate new.Mapping Templatesonly allowMap to.
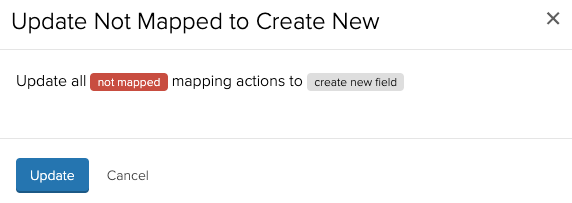
In the tabs for those items that allow the Create new action, and if there are still undefined mappings, there will
be a button Update Not Mapped to Create New, which is just a shorthand for editing all the mappings of that type that
are not mapped and selecting the Create new ... action for all of them. This may be useful if you have a long list
of items that require mapping, so you can edit some of the mappings manually, and then use this button to complete the
rest of them.
Once you have defined all the existing mappings, there will be a success panel at the top of the page, with a button
Continue Import. By clicking this button, you will be redirected back to the list of imports, and the state of your
import will be set as importing again.

Retrying an import
If the state of your import is failed, it means that something went wrong when processing it. It is likely that the
error is related to either invalid data in the JSON file, or something configured incorrectly in the original Case Type.
In that case, retrying the import will not make any difference, and you will have to try with another export file.
However, a different type of unexpected error might occur, in which case it will be useful to retry it. In order to
retry your import, click the Retry link in the Actions column, which will reload the page and move your import
back to the importing state.
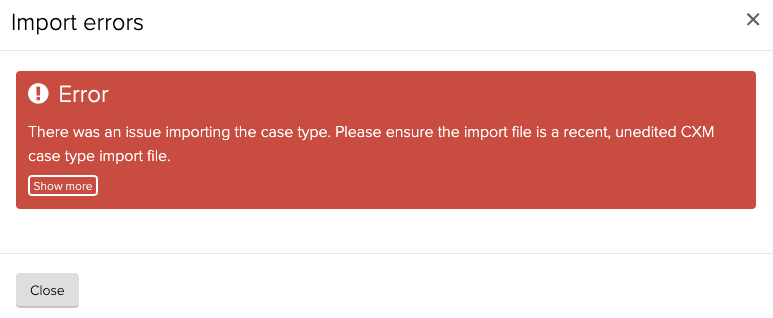
Viewing import errors
When your import is in the failed state, the Actions column will contain a link to View errors. By clicking this
link, a modal will open up, containing details about the specific error. The details of the error may not be very clear,
but they may be useful for example if you want to raise a support ticket. Before raising a support ticket, please make
sure you are using a valid JSON file that has not been manually edited, since that behaviour is not supported.
Viewing mappings
Once the import is in the completed state, there will be a View mappings link in the Actions column. This link
will take you to the mappings page, where you will be able to see all the mappings you configured during the mapping
configuration step. You can see the original name of the item, the mapping action you selected and the name of the item
you mapped it to, if any. Of course, you cannot edit those mappings anymore, because the import has finished already.
Undoing an import
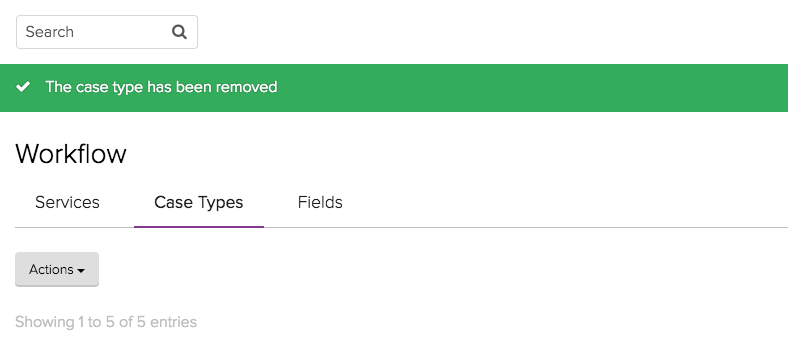
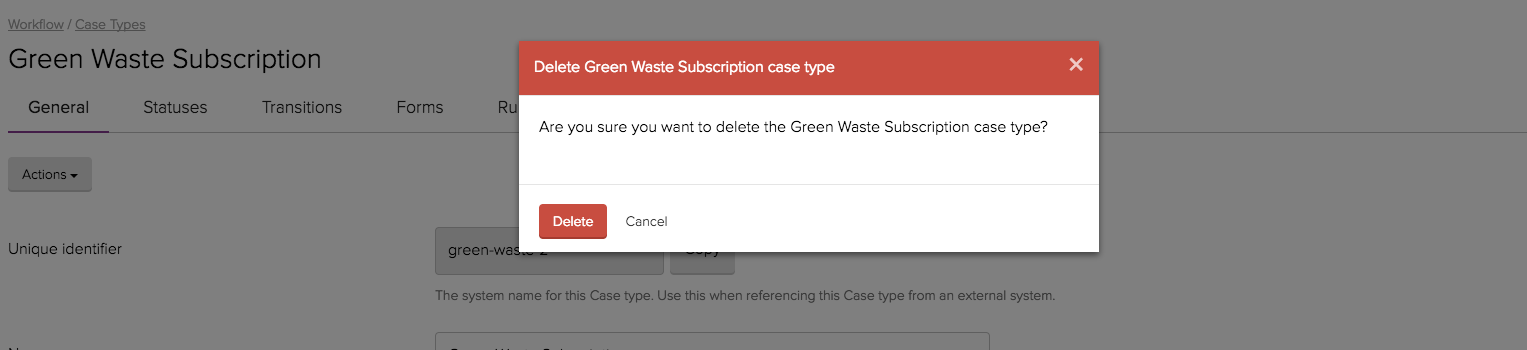
As long as you haven't added any cases for the case type you imported, you can delete it again:
You'll be prompted to confirm before the case type will actually be deleted:
And the deletion will be confirmed if successful: